Welcome to the guide for setting up SSO and SCIM with JumpCloud (SAML or OIDC based) for your SiftHub account.
Why SSO?
Single Sign-On (SSO) integration allows your team to access SiftHub using their existing JumpCloud credentials, eliminating the need for separate logins while ensuring secure access. This provides centralized authentication and enhanced security for your organization.
Why SCIM?
SCIM (System for Cross-domain Identity Management) automates user provisioning and management in SiftHub directly from your JumpCloud dashboard. This means when you add, deactivate or update users in JumpCloud, their SiftHub access is automatically managed, saving significant IT administration time.
Are both necessary?
While you can implement SSO without SCIM, we recommend using both for complete user lifecycle management. Here's what happens with SSO alone:
- Users can log in to SiftHub using JumpCloud credentials
- BUT new users still need to be manually created in SiftHub as well as provisioned to access SiftHub in JumpCloud
- When employees leave, their SiftHub accounts need manual deactivation
Using both SSO and SCIM automates the entire user lifecycle, from creation through updation to deletion, making it the recommended setup for enterprises.
This guide will walk through step by step instructions of how to set up SSO/SCIM using JumpCloud for your SiftHub account.
Prerequisites
Before starting the setup, ensure you have:
- Administrator access to your JumpCloud account
- Access to the "Security" > "Authentication" section in the "Settings" panel of the SiftHub Account.
(This is usually visible to users having the 'Account Owner' and 'Security Admin' roles in SiftHub. If the Account Owner has administrator access in JumpCloud, they are equipped with the requisite permissions to complete the process. Otherwise, add the JumpCloud administrator of your organization as a user in SiftHub with the Security Admin role. This user can be removed from SiftHub subsequently if you prefer so as to not consume an account license.)
- Valid login credentials (email and password) for SiftHub. (These will be deprecated once SSO with JumpCloud is set up)
This guide will walk through step-by-step instructions of how to set up SSO/SCIM using JumpCloud for your SiftHub account.
Step 1: Set Up SSO with JumpCloud
SSO links SiftHub to JumpCloud for easy, secure logins. Here’s how:
-
Log In to JumpCloud
Open the JumpCloud Admin Console at console.jumpcloud.com and sign in as an admin.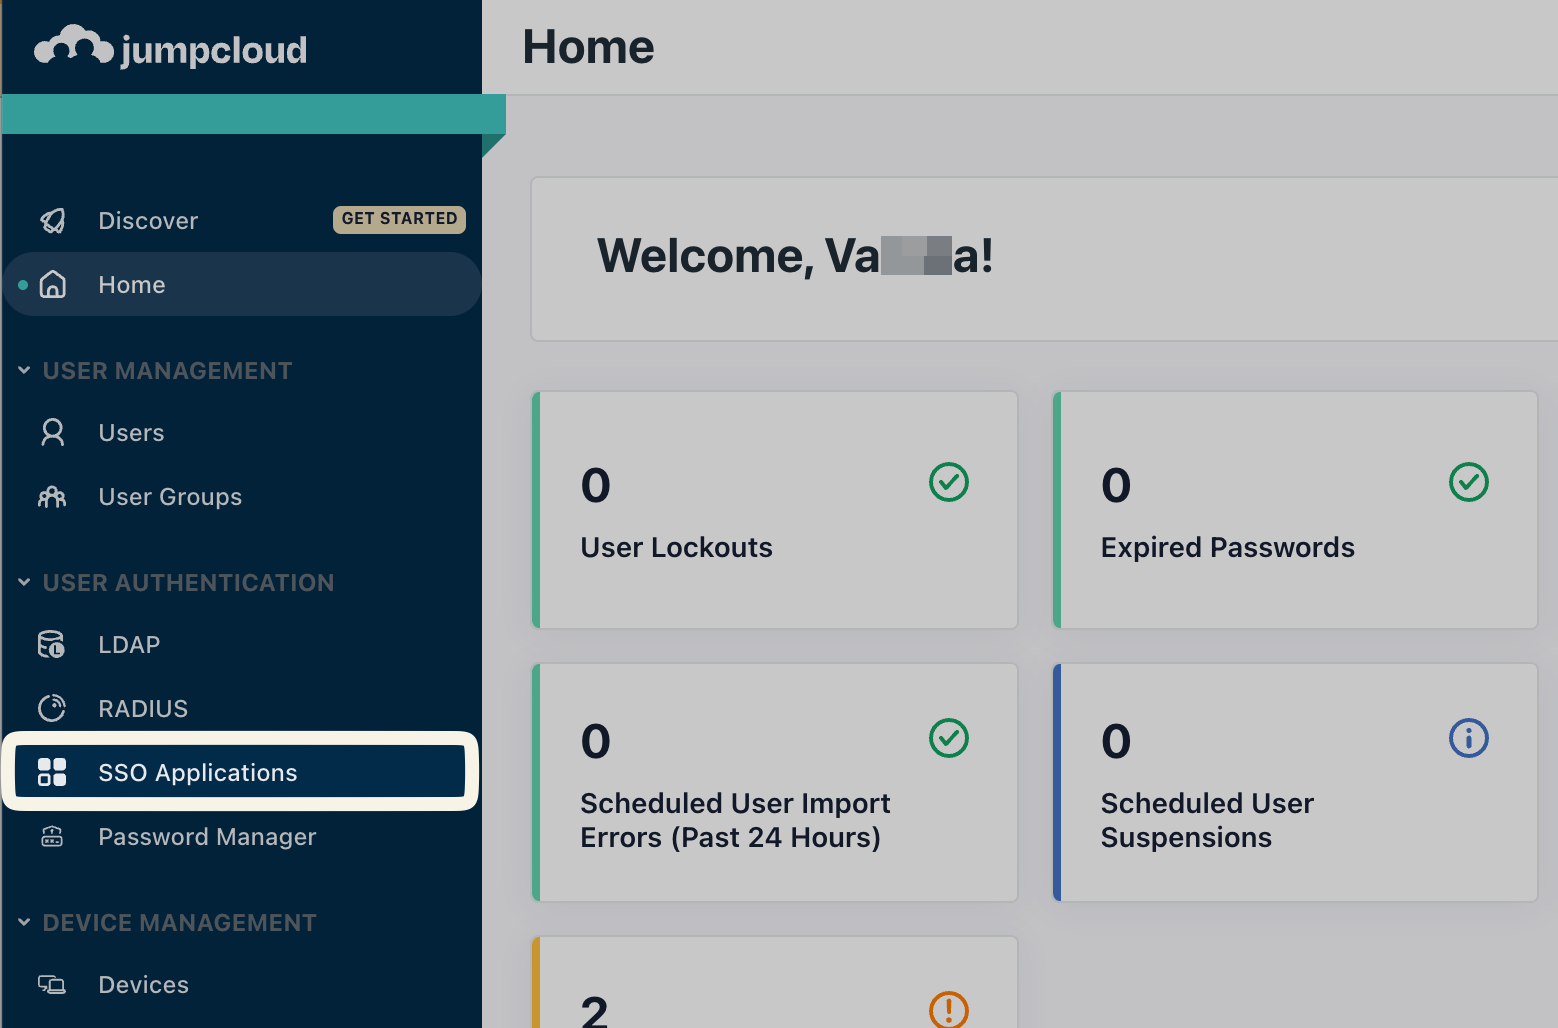
-
Add SiftHub as an App
Go to USER AUTHENTICATION > SSO, then click the + button (or Add New Application). Select Custom SAML App.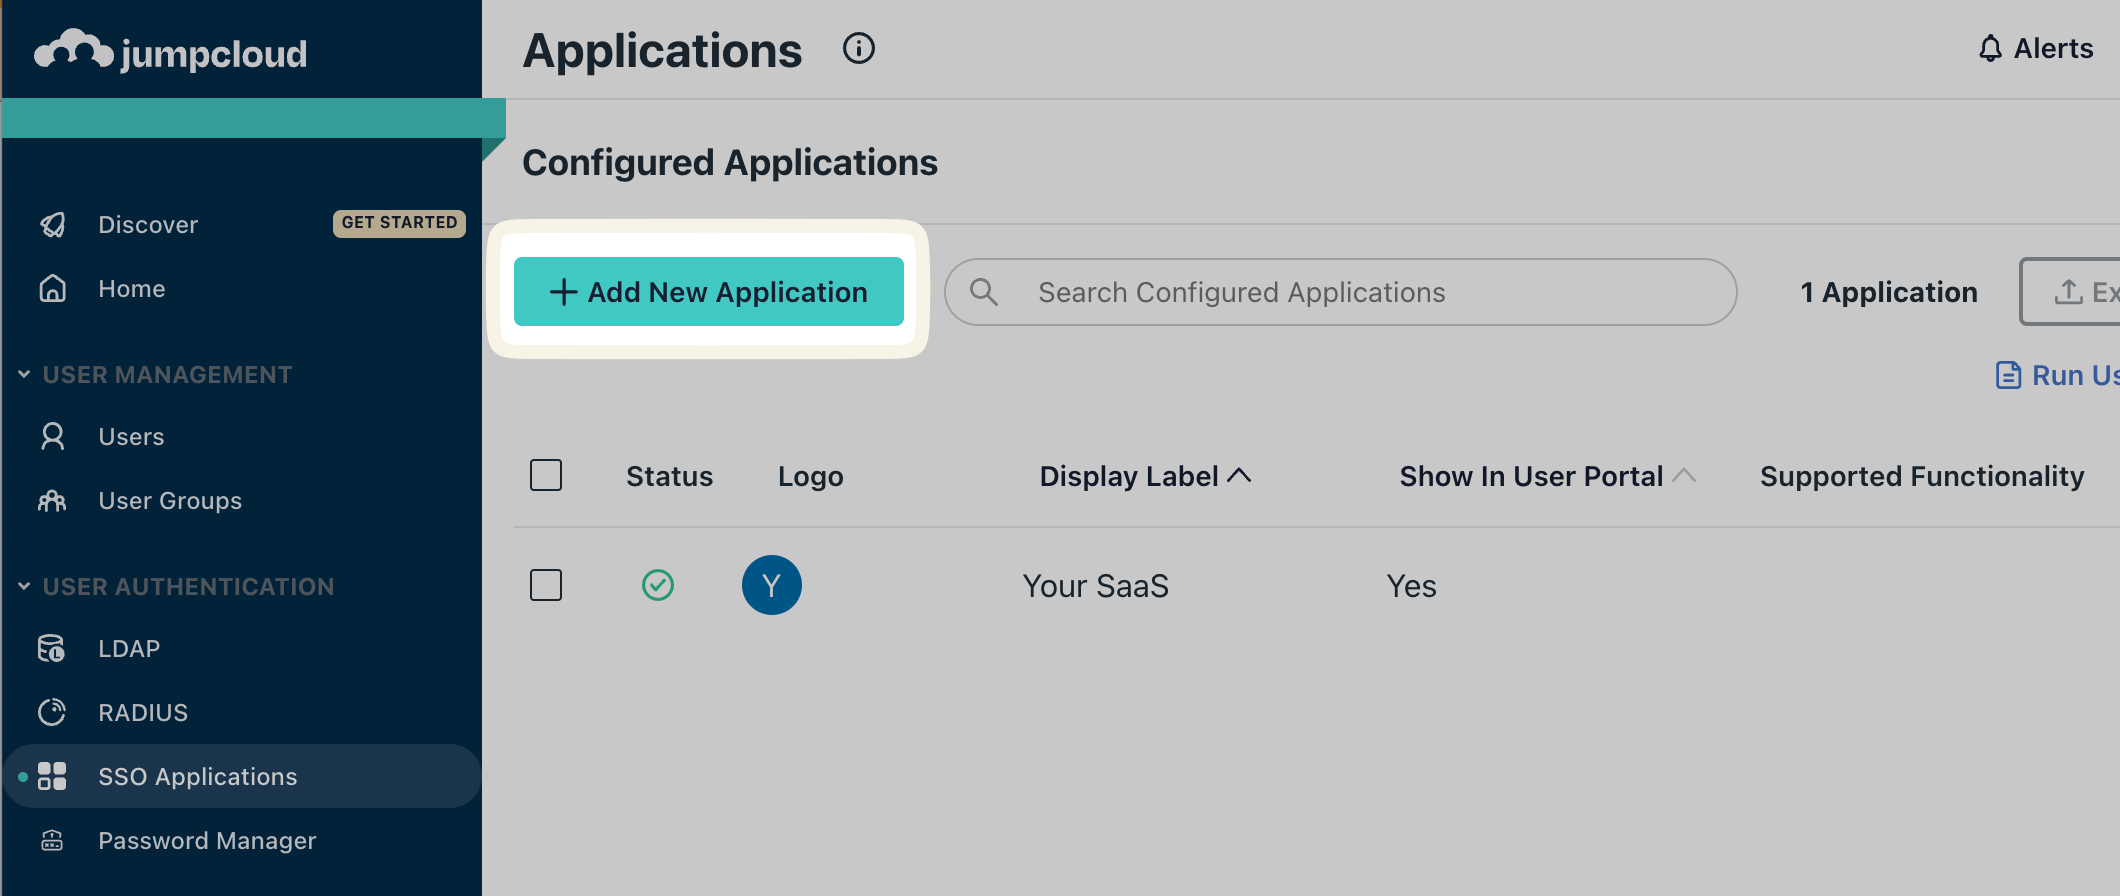
-
Name Your App
In the General Info tab, enter a name like “SiftHub SSO” in the Display Label field. (Optional: Add a description or logo.) Click Next.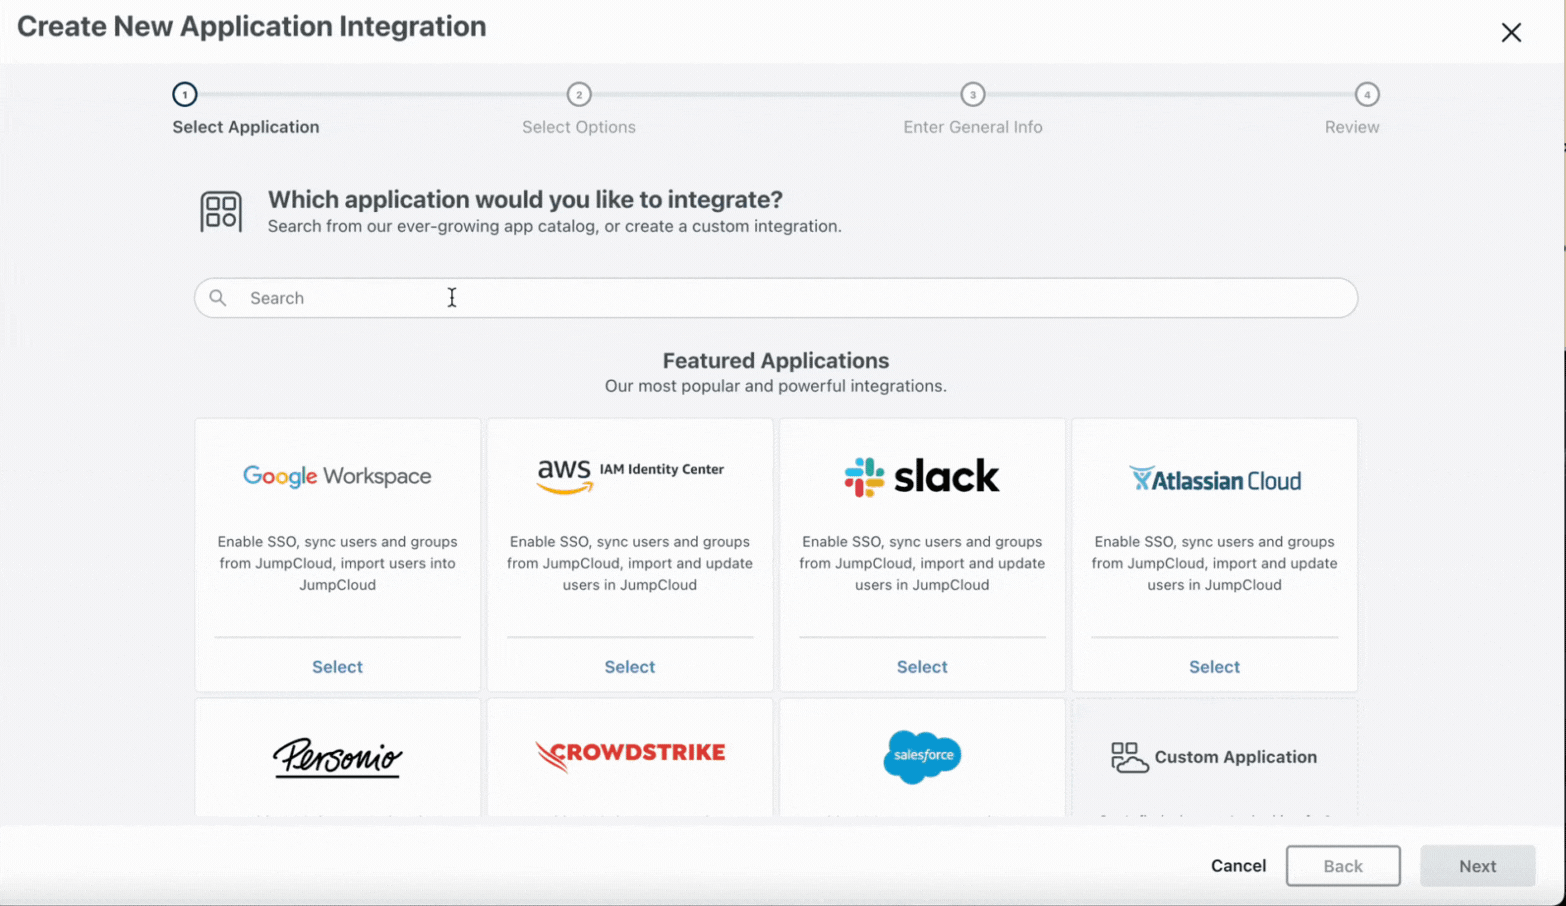
-
Get SiftHub Details
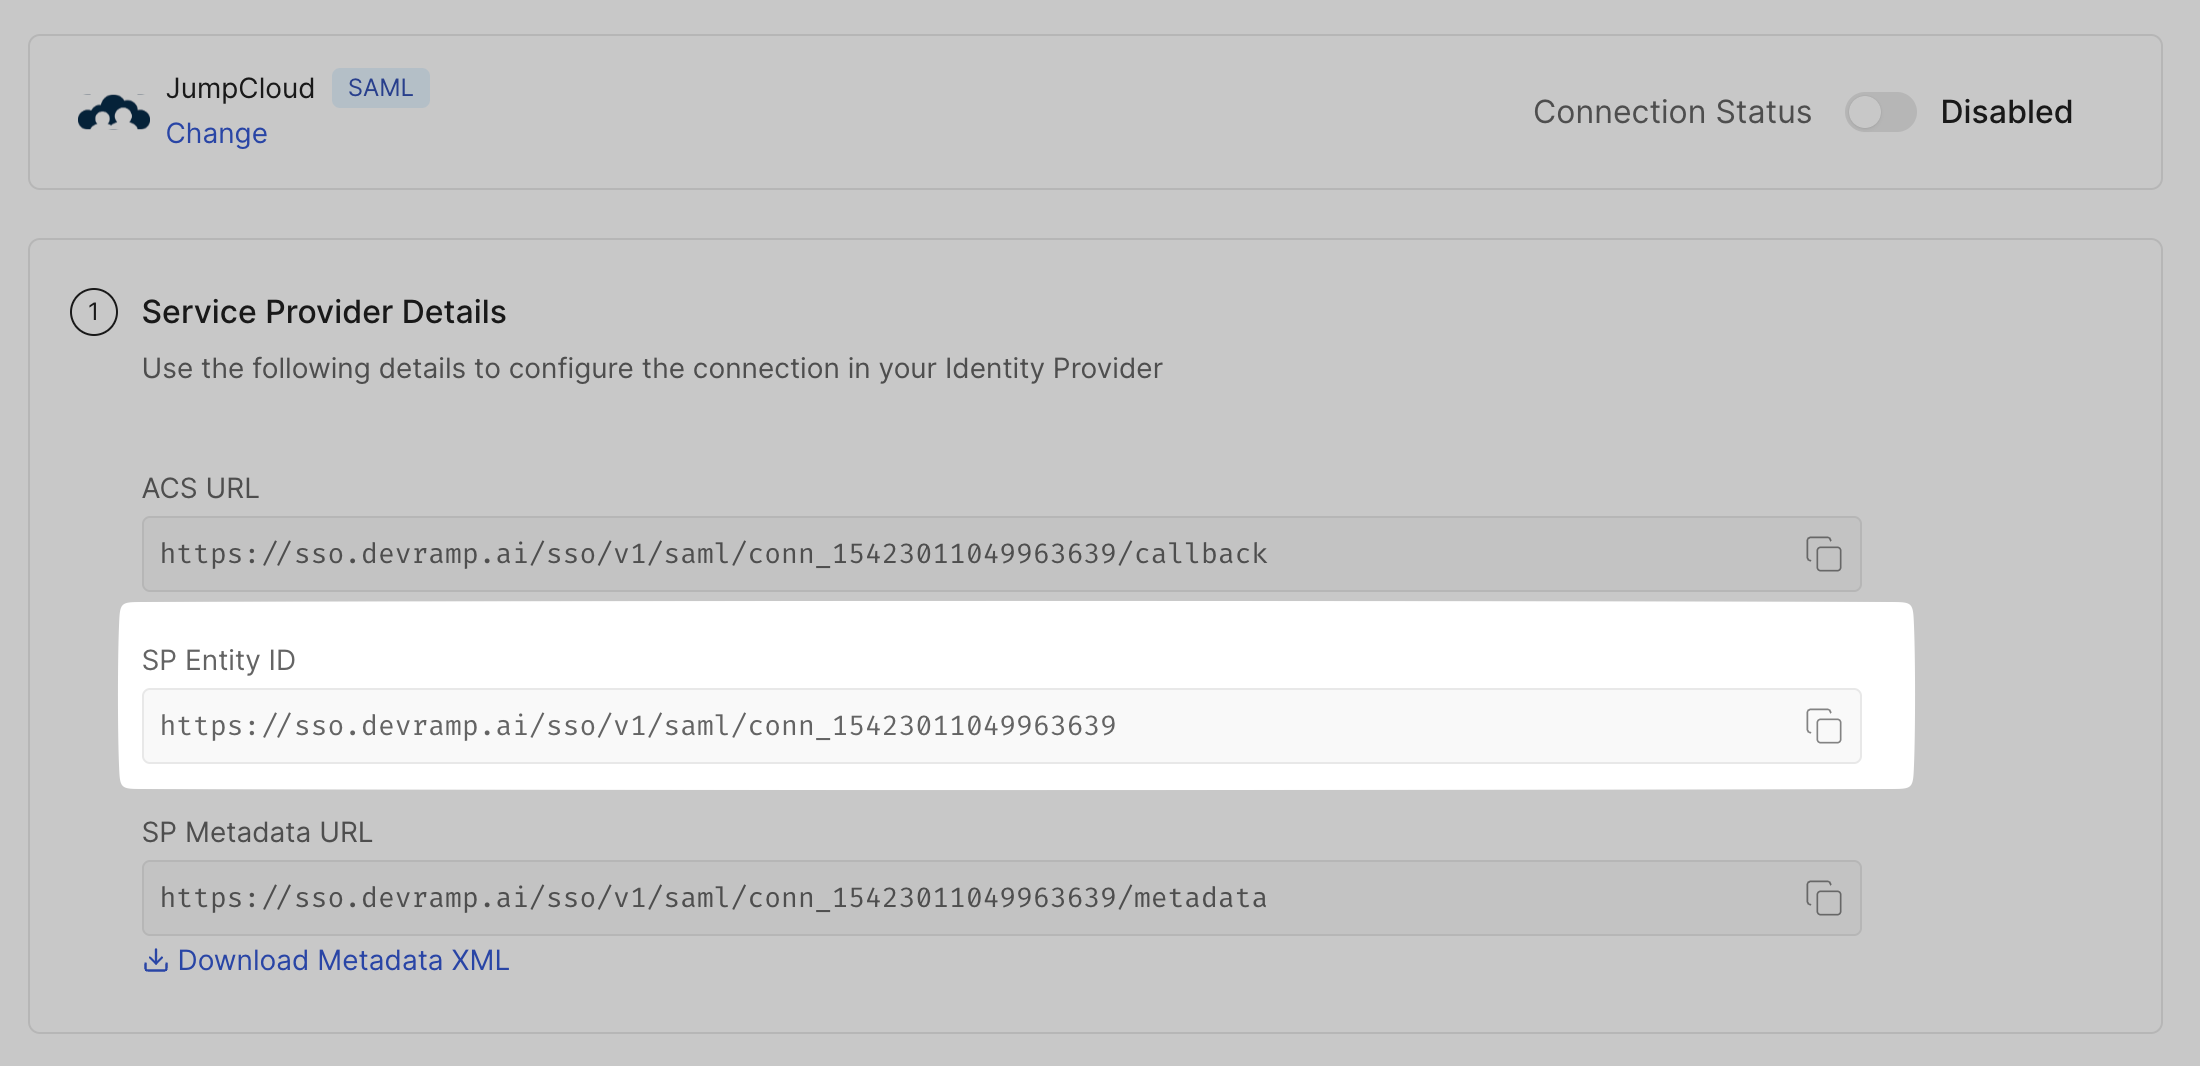
- Log in to SiftHub as an Account Owner or Security Admin.
- Go to Settings > Security > Authentication, then click Set up SSO.
- Copy the Service Provider Details (like the ACS URL and Entity ID) displayed here.
-
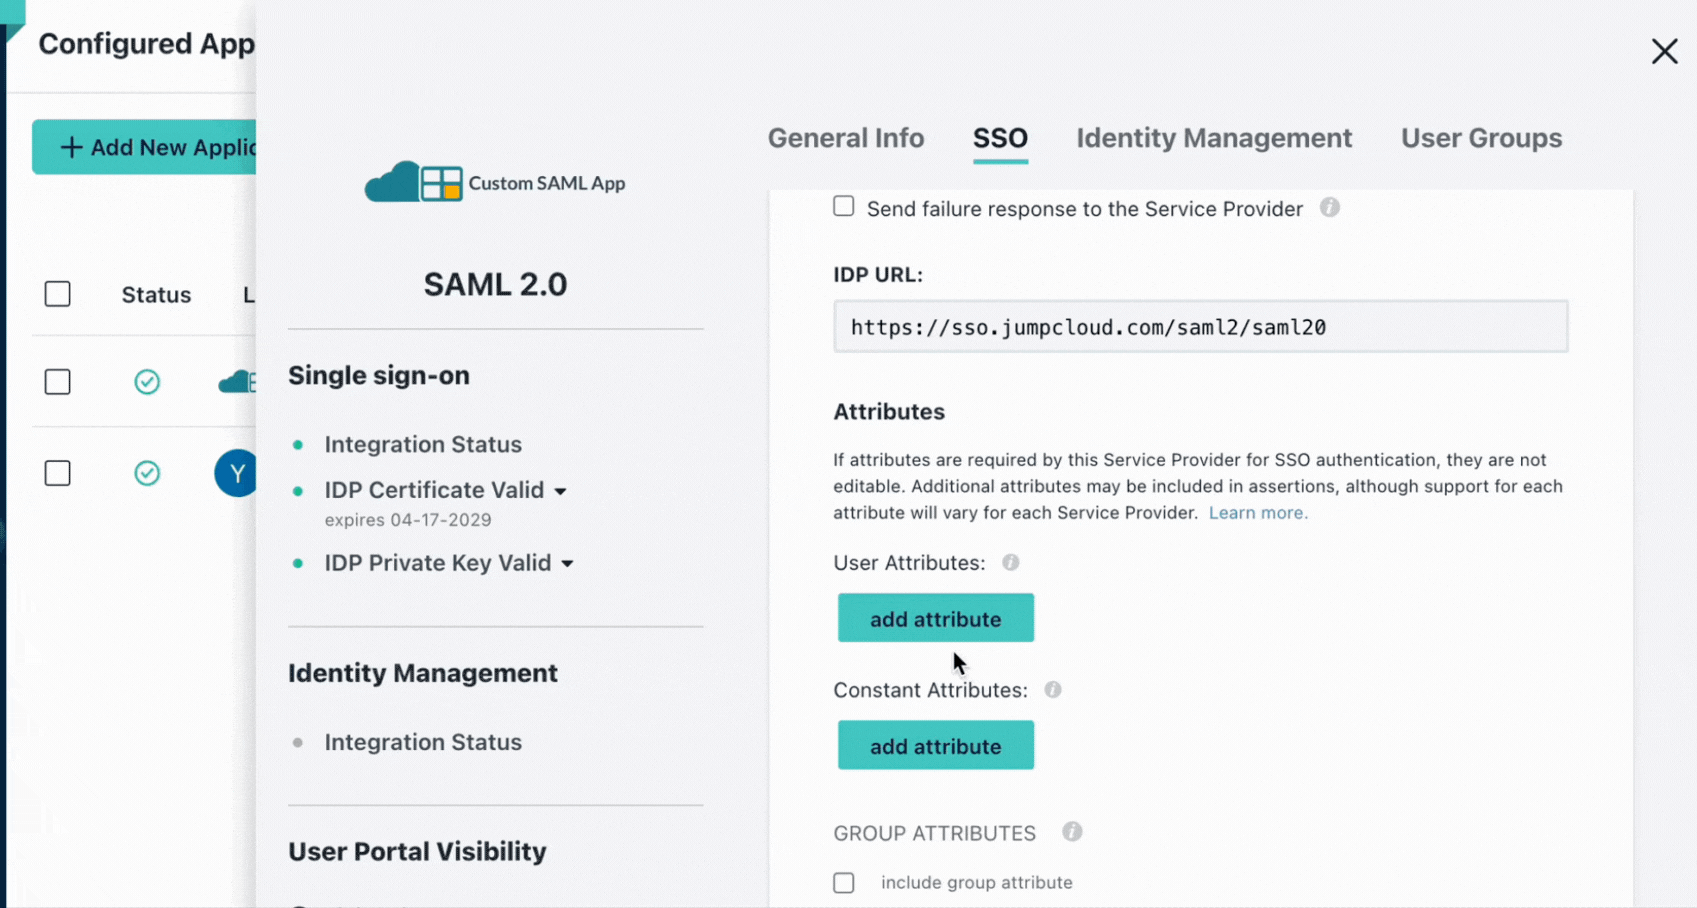
Configure SAML in JumpCloud
- Back in JumpCloud, go to the SSO tab.
- Paste the ACS URL from SiftHub into ACS URL.
- Paste the Entity ID from SiftHub into SP Entity ID.
- For IdP Entity ID, enter a unique name (e.g., “JumpCloud-SiftHub”).
- Leave IdP URL as the default or customize it (e.g., https://sso.jumpcloud.com/saml2/sifthub).
- Under Attributes, add:
- email → user.email
- firstName → user.firstName
- lastName → user.lastName
- Click activate, then continue.
-
Download JumpCloud Metadata
- In the SSO tab, find JumpCloud Metadata and click Export Metadata. Save the XML file.
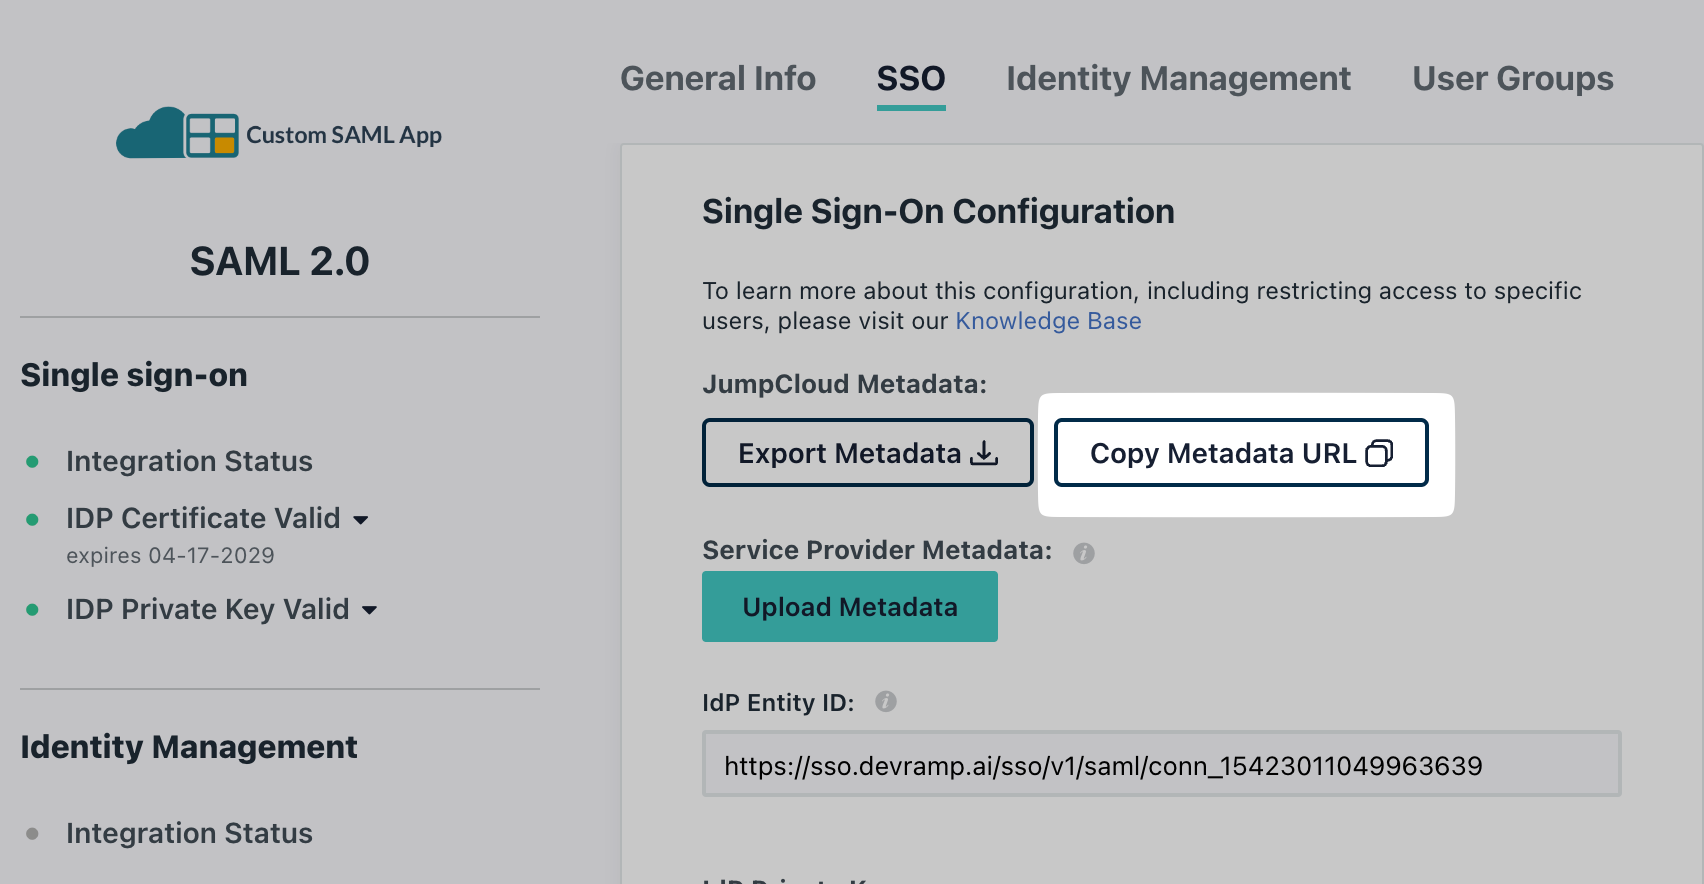
- In the SSO tab, find JumpCloud Metadata and click Export Metadata. Save the XML file.
-
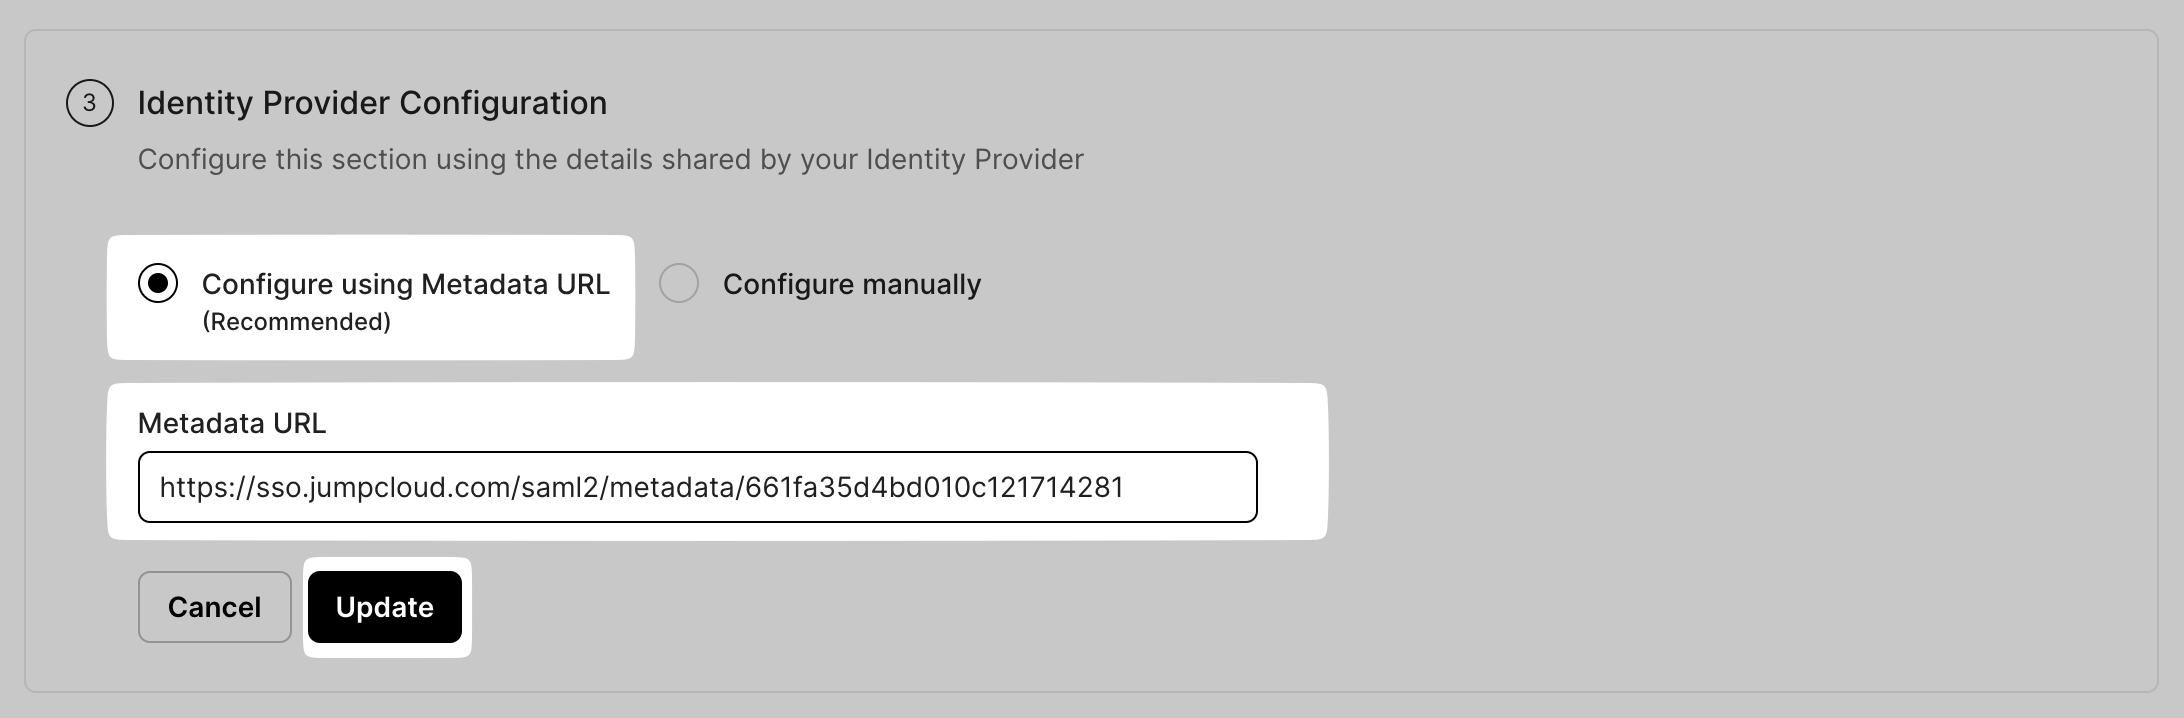
Finish SSO in SiftHub
- Return to SiftHub’s Settings > Security > Set up SSO.
- Under Identity Provider Configuration, select Configure using Metadata URL.
- Upload the XML file from JumpCloud or paste the Metadata URL (copied from JumpCloud’s Copy Metadata URL option).
- Click Update.
-
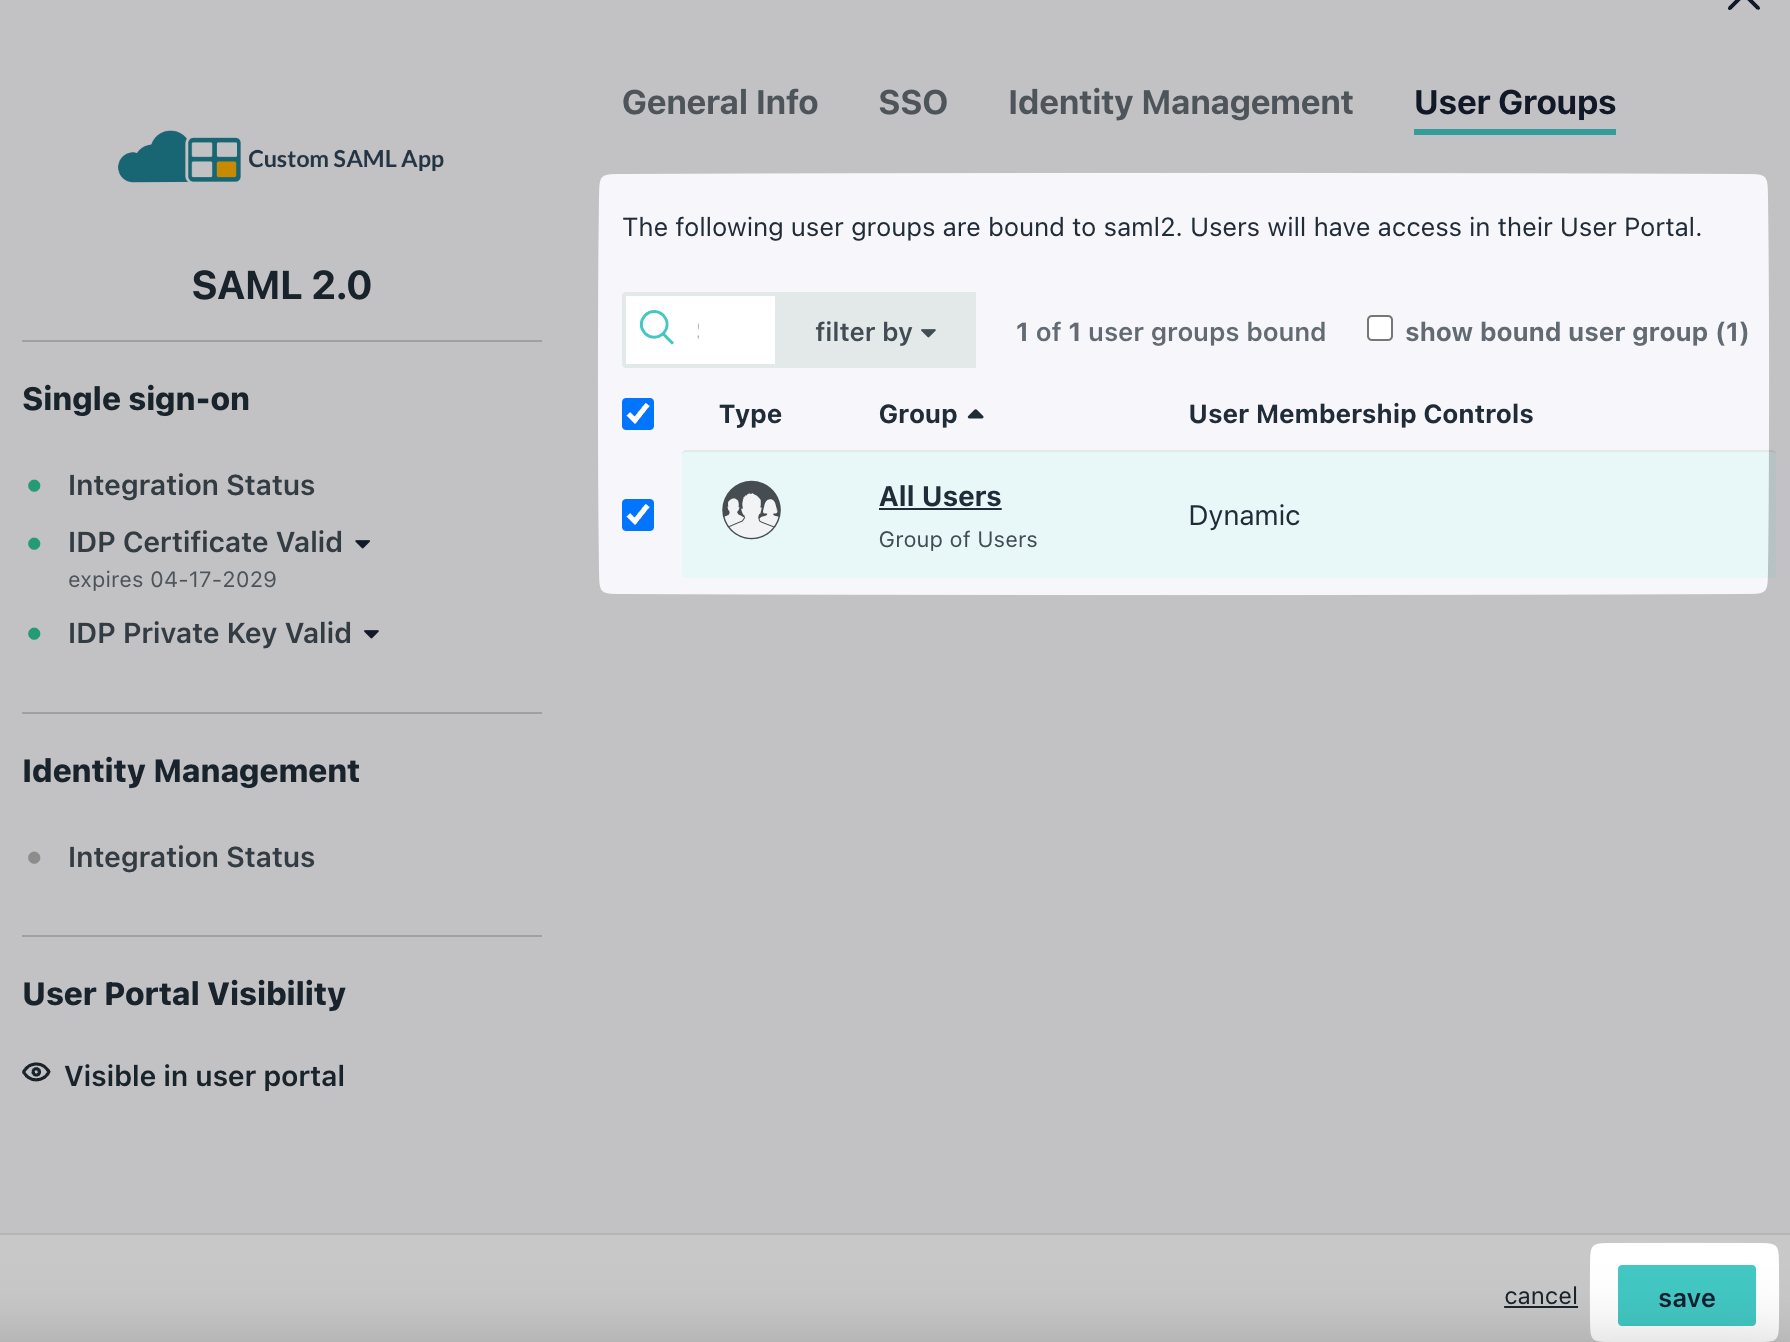
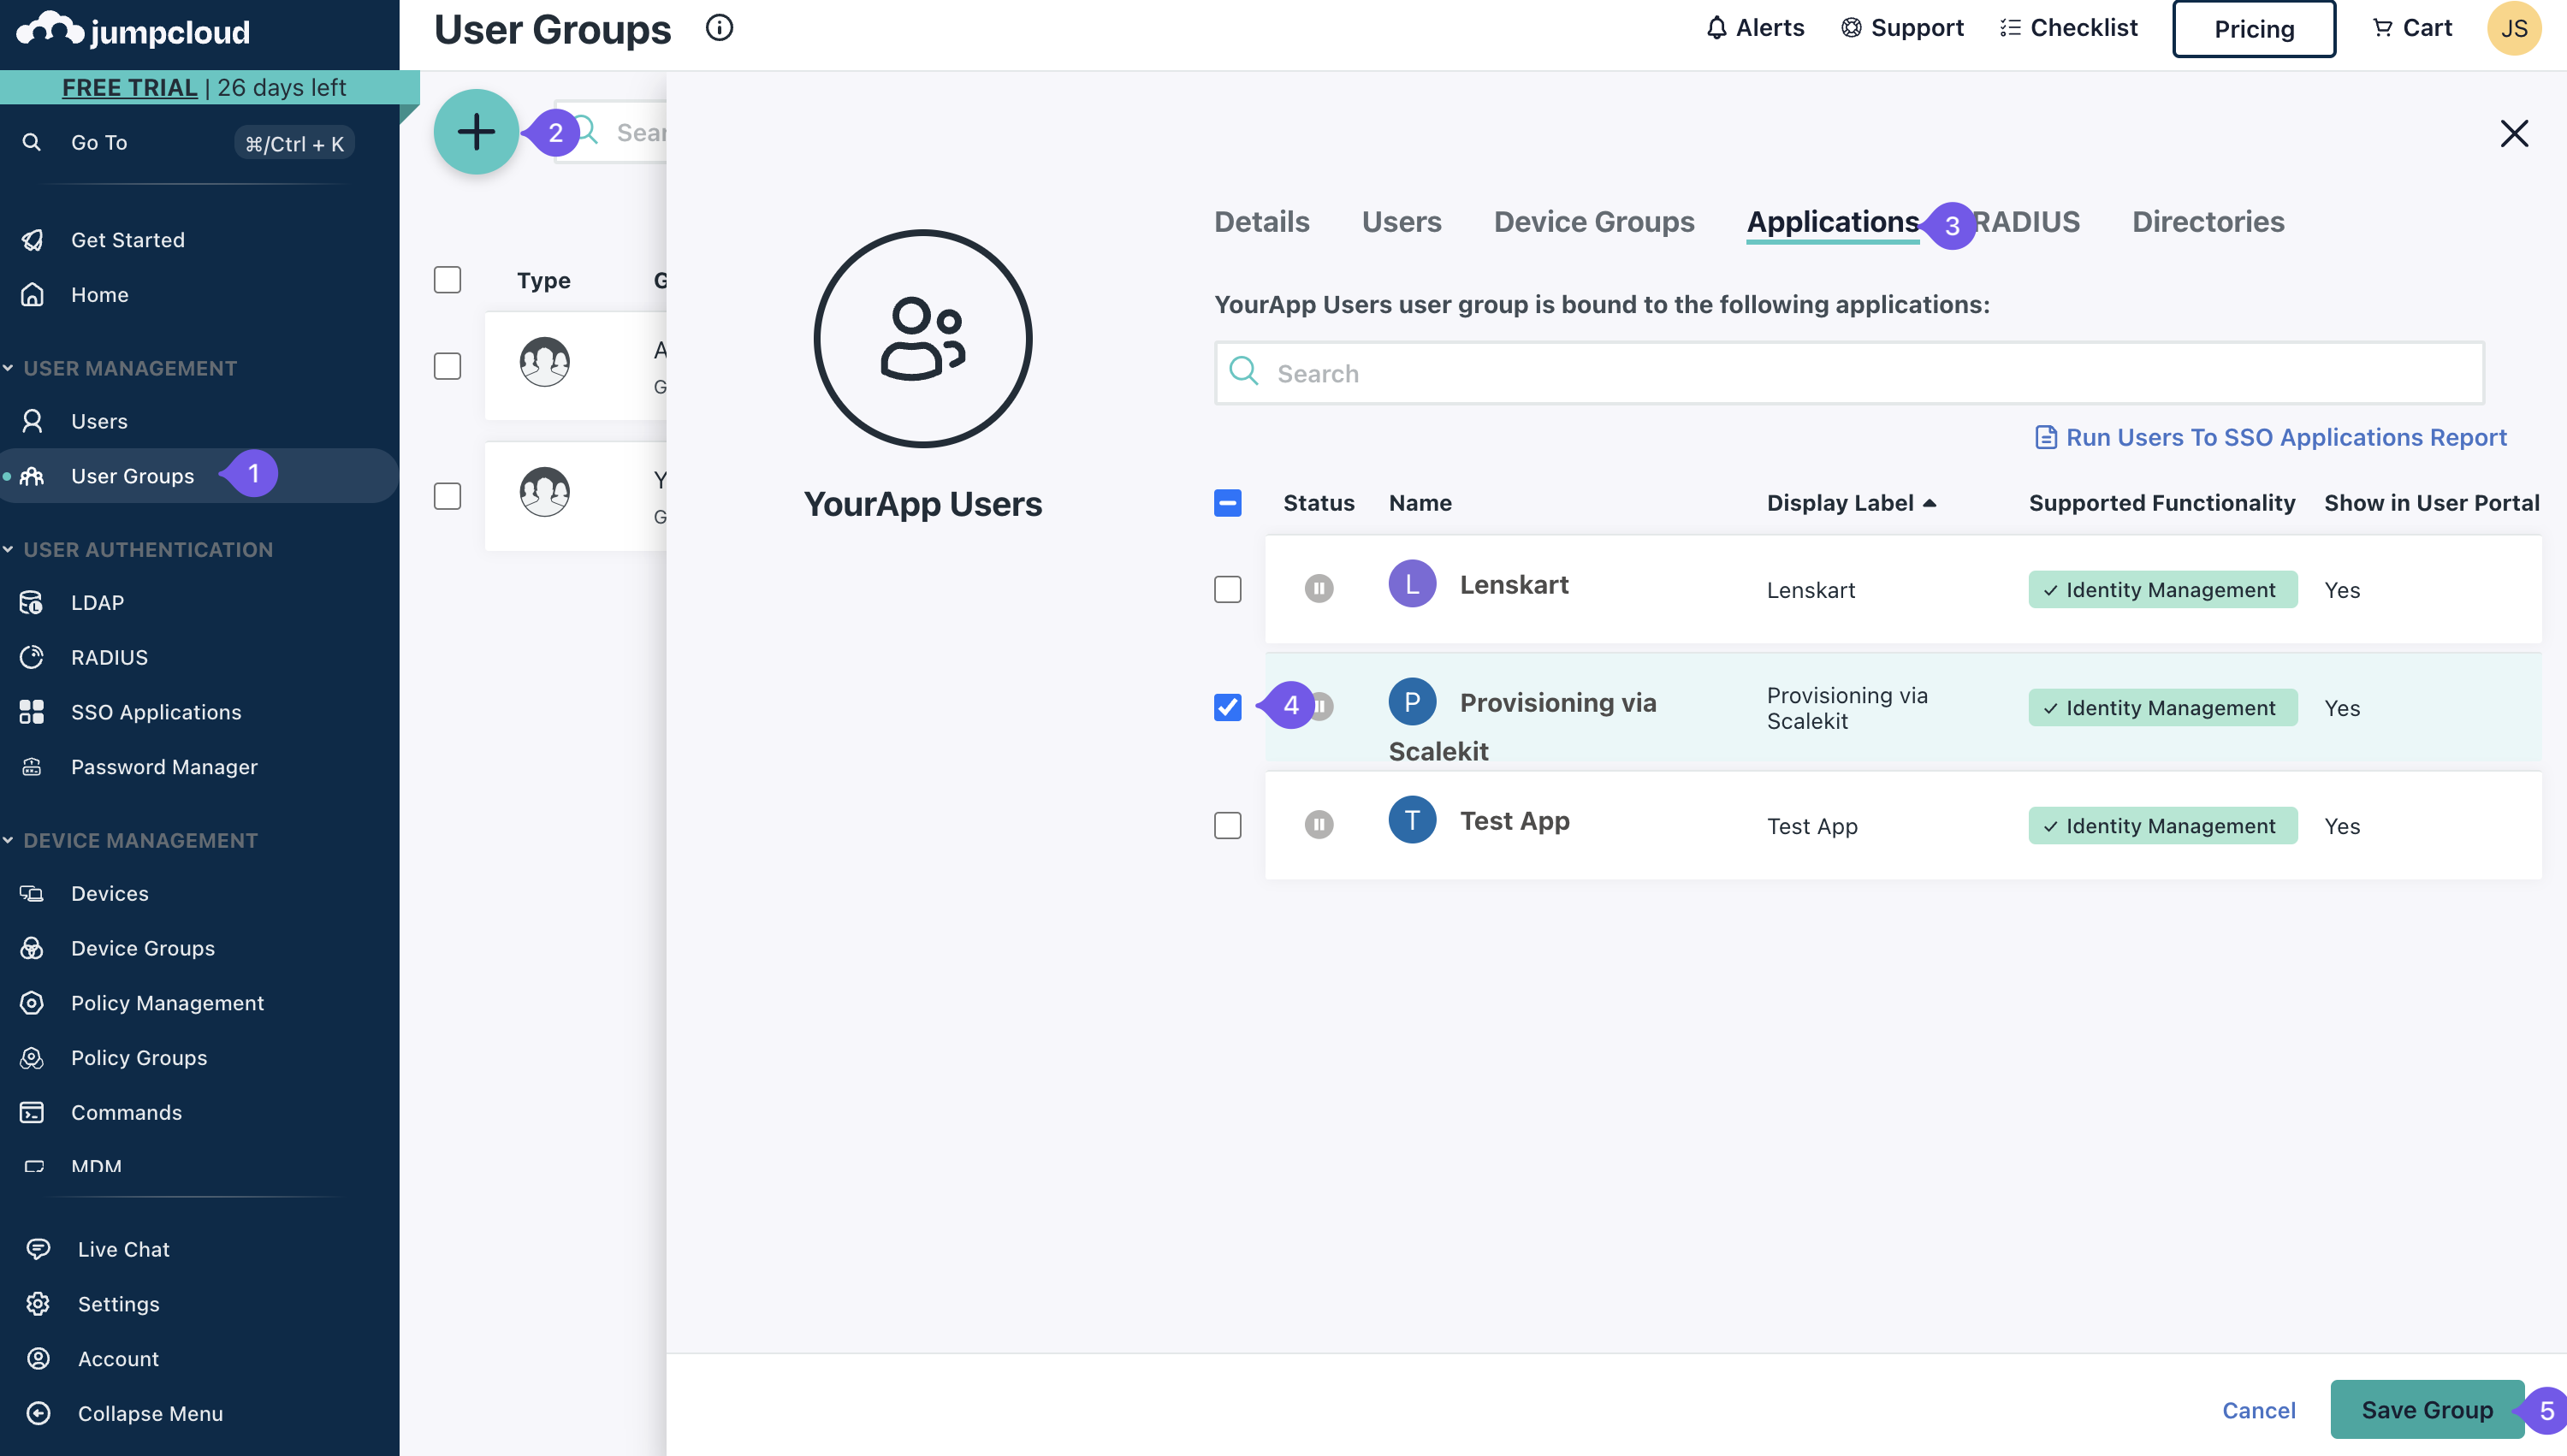
Assign Users
- In JumpCloud, go to the User Groups tab for your SiftHub app.
- Add a group (e.g., “SiftHub Users”) and assign team members who need access.
- Save your changes.
Step 2: Set Up SCIM with JumpCloud
SCIM keeps your SiftHub user list in sync with JumpCloud. Here’s how to set it up:
-
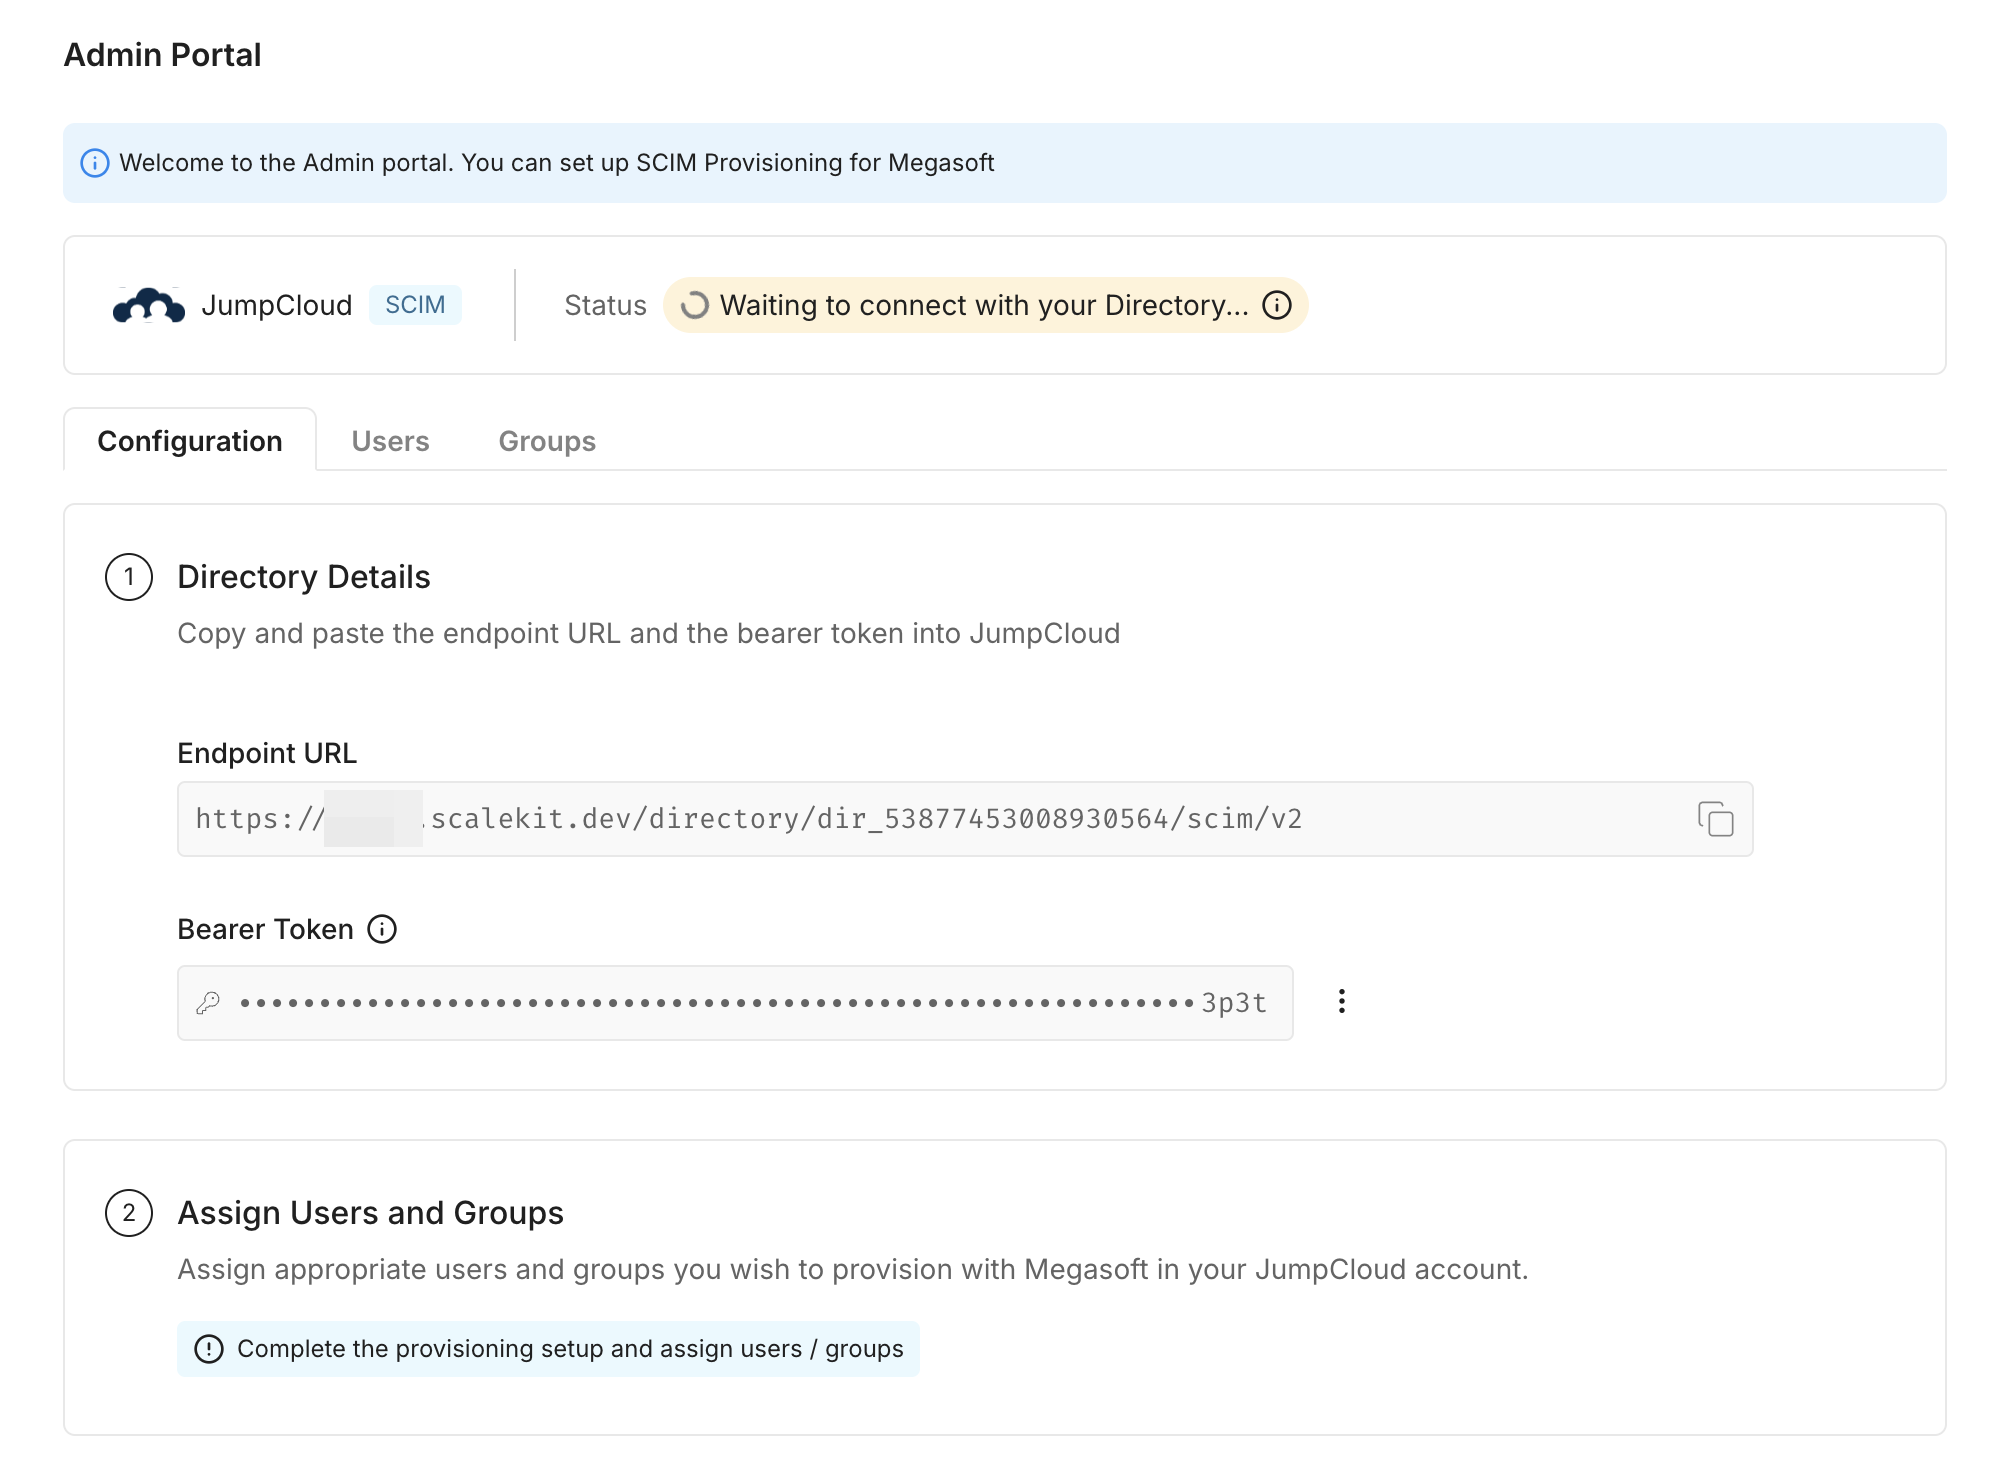
Start in SiftHub
- Log in as an Account Owner or Security Admin.
- Go to Settings > Security > Authentication, then click Set up SCIM.
- Under Directory Details, copy the Endpoint URL and Bearer Token.
-
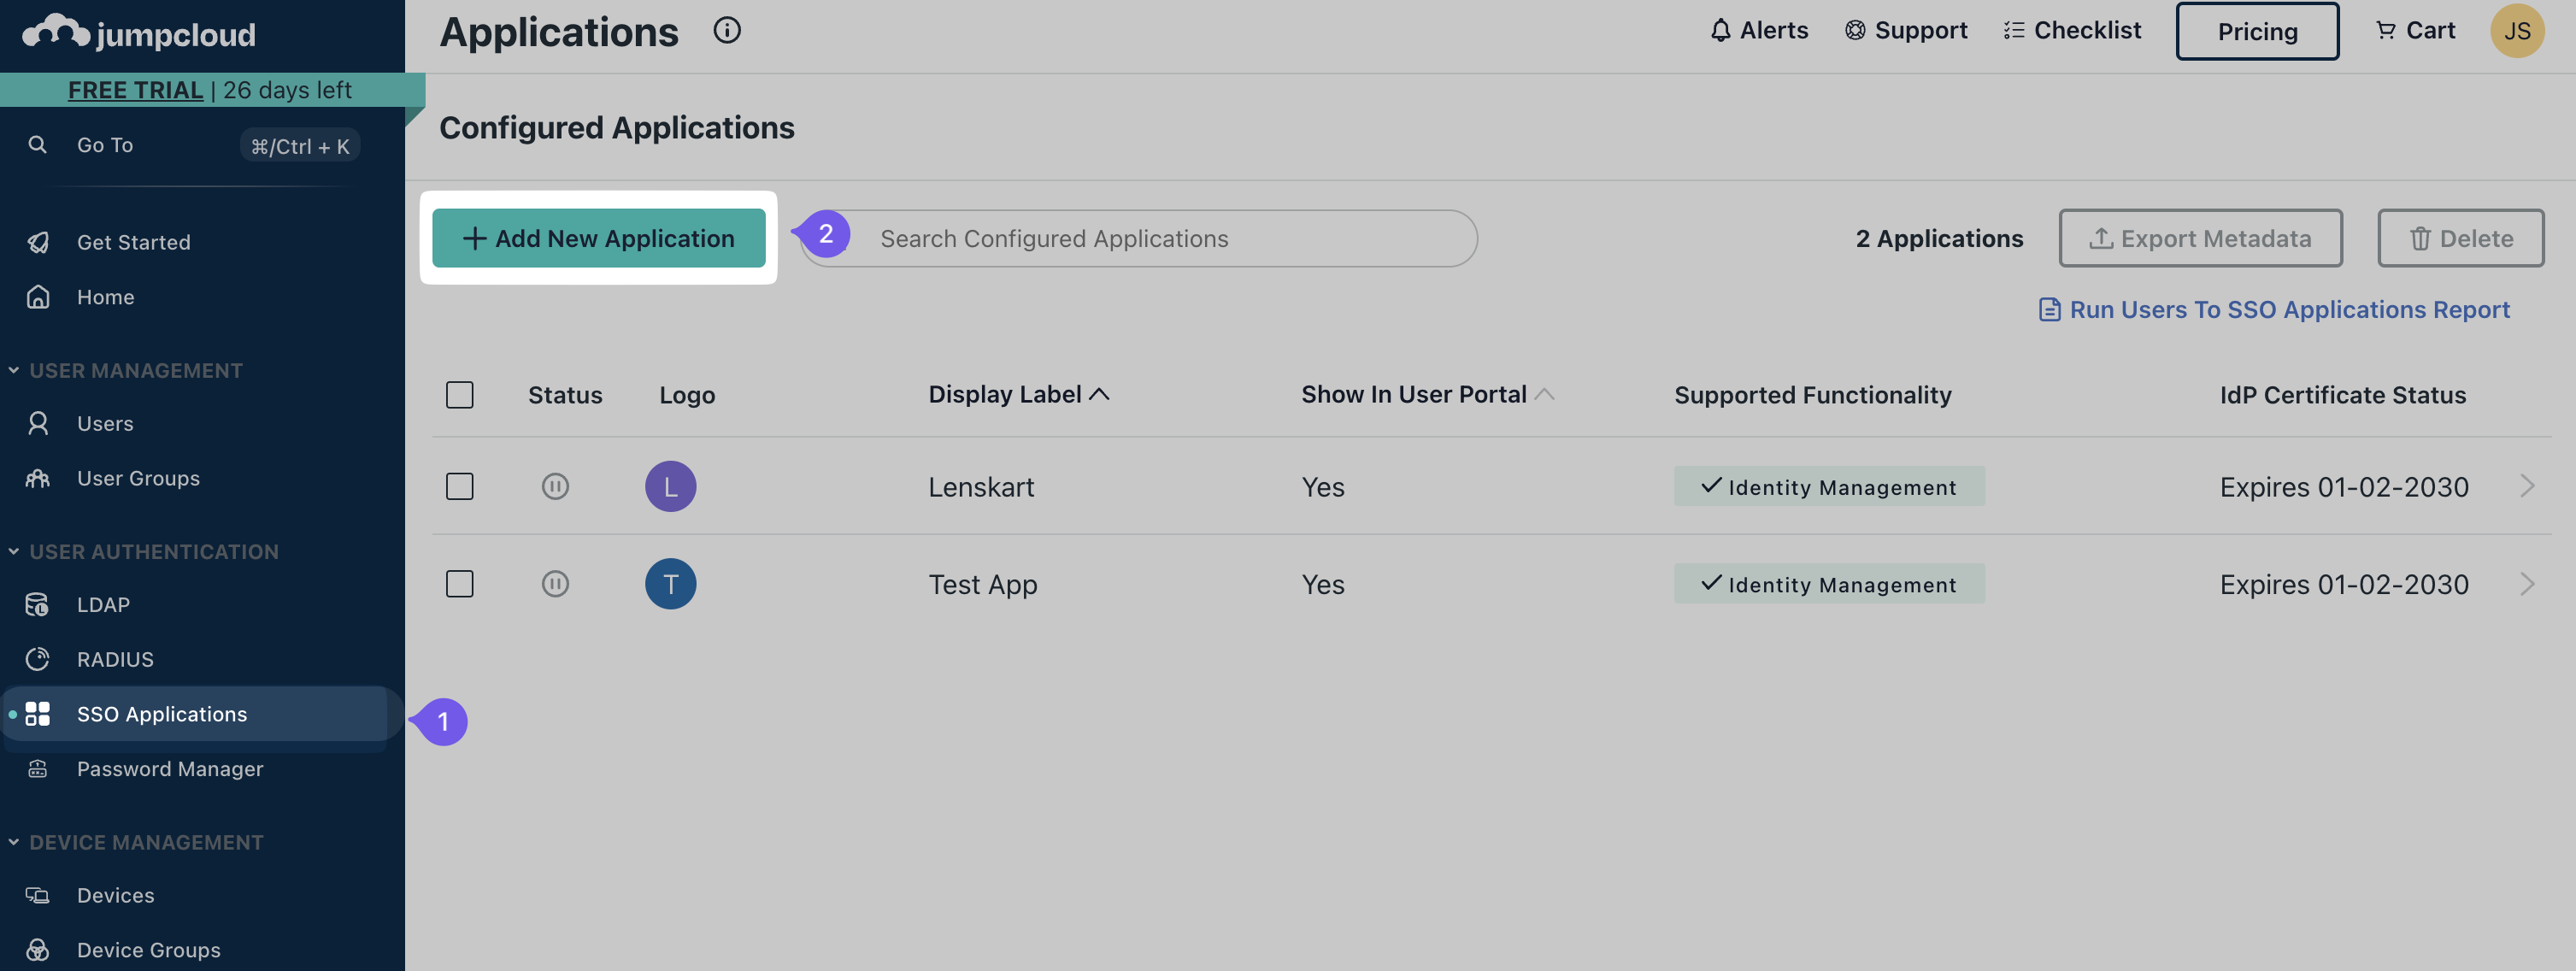
Add SCIM App in JumpCloud
- In the JumpCloud Admin Console, go to USER AUTHENTICATION > SSO.
- Click + or Add New Application, then search for “SCIM”.
- Select SCIM 2.0 Test App (OAuth Bearer Token) and click configure.
-
Name the SCIM App
- Enter a name like “SiftHub SCIM” in Display Label. Click Next, then Done.
-
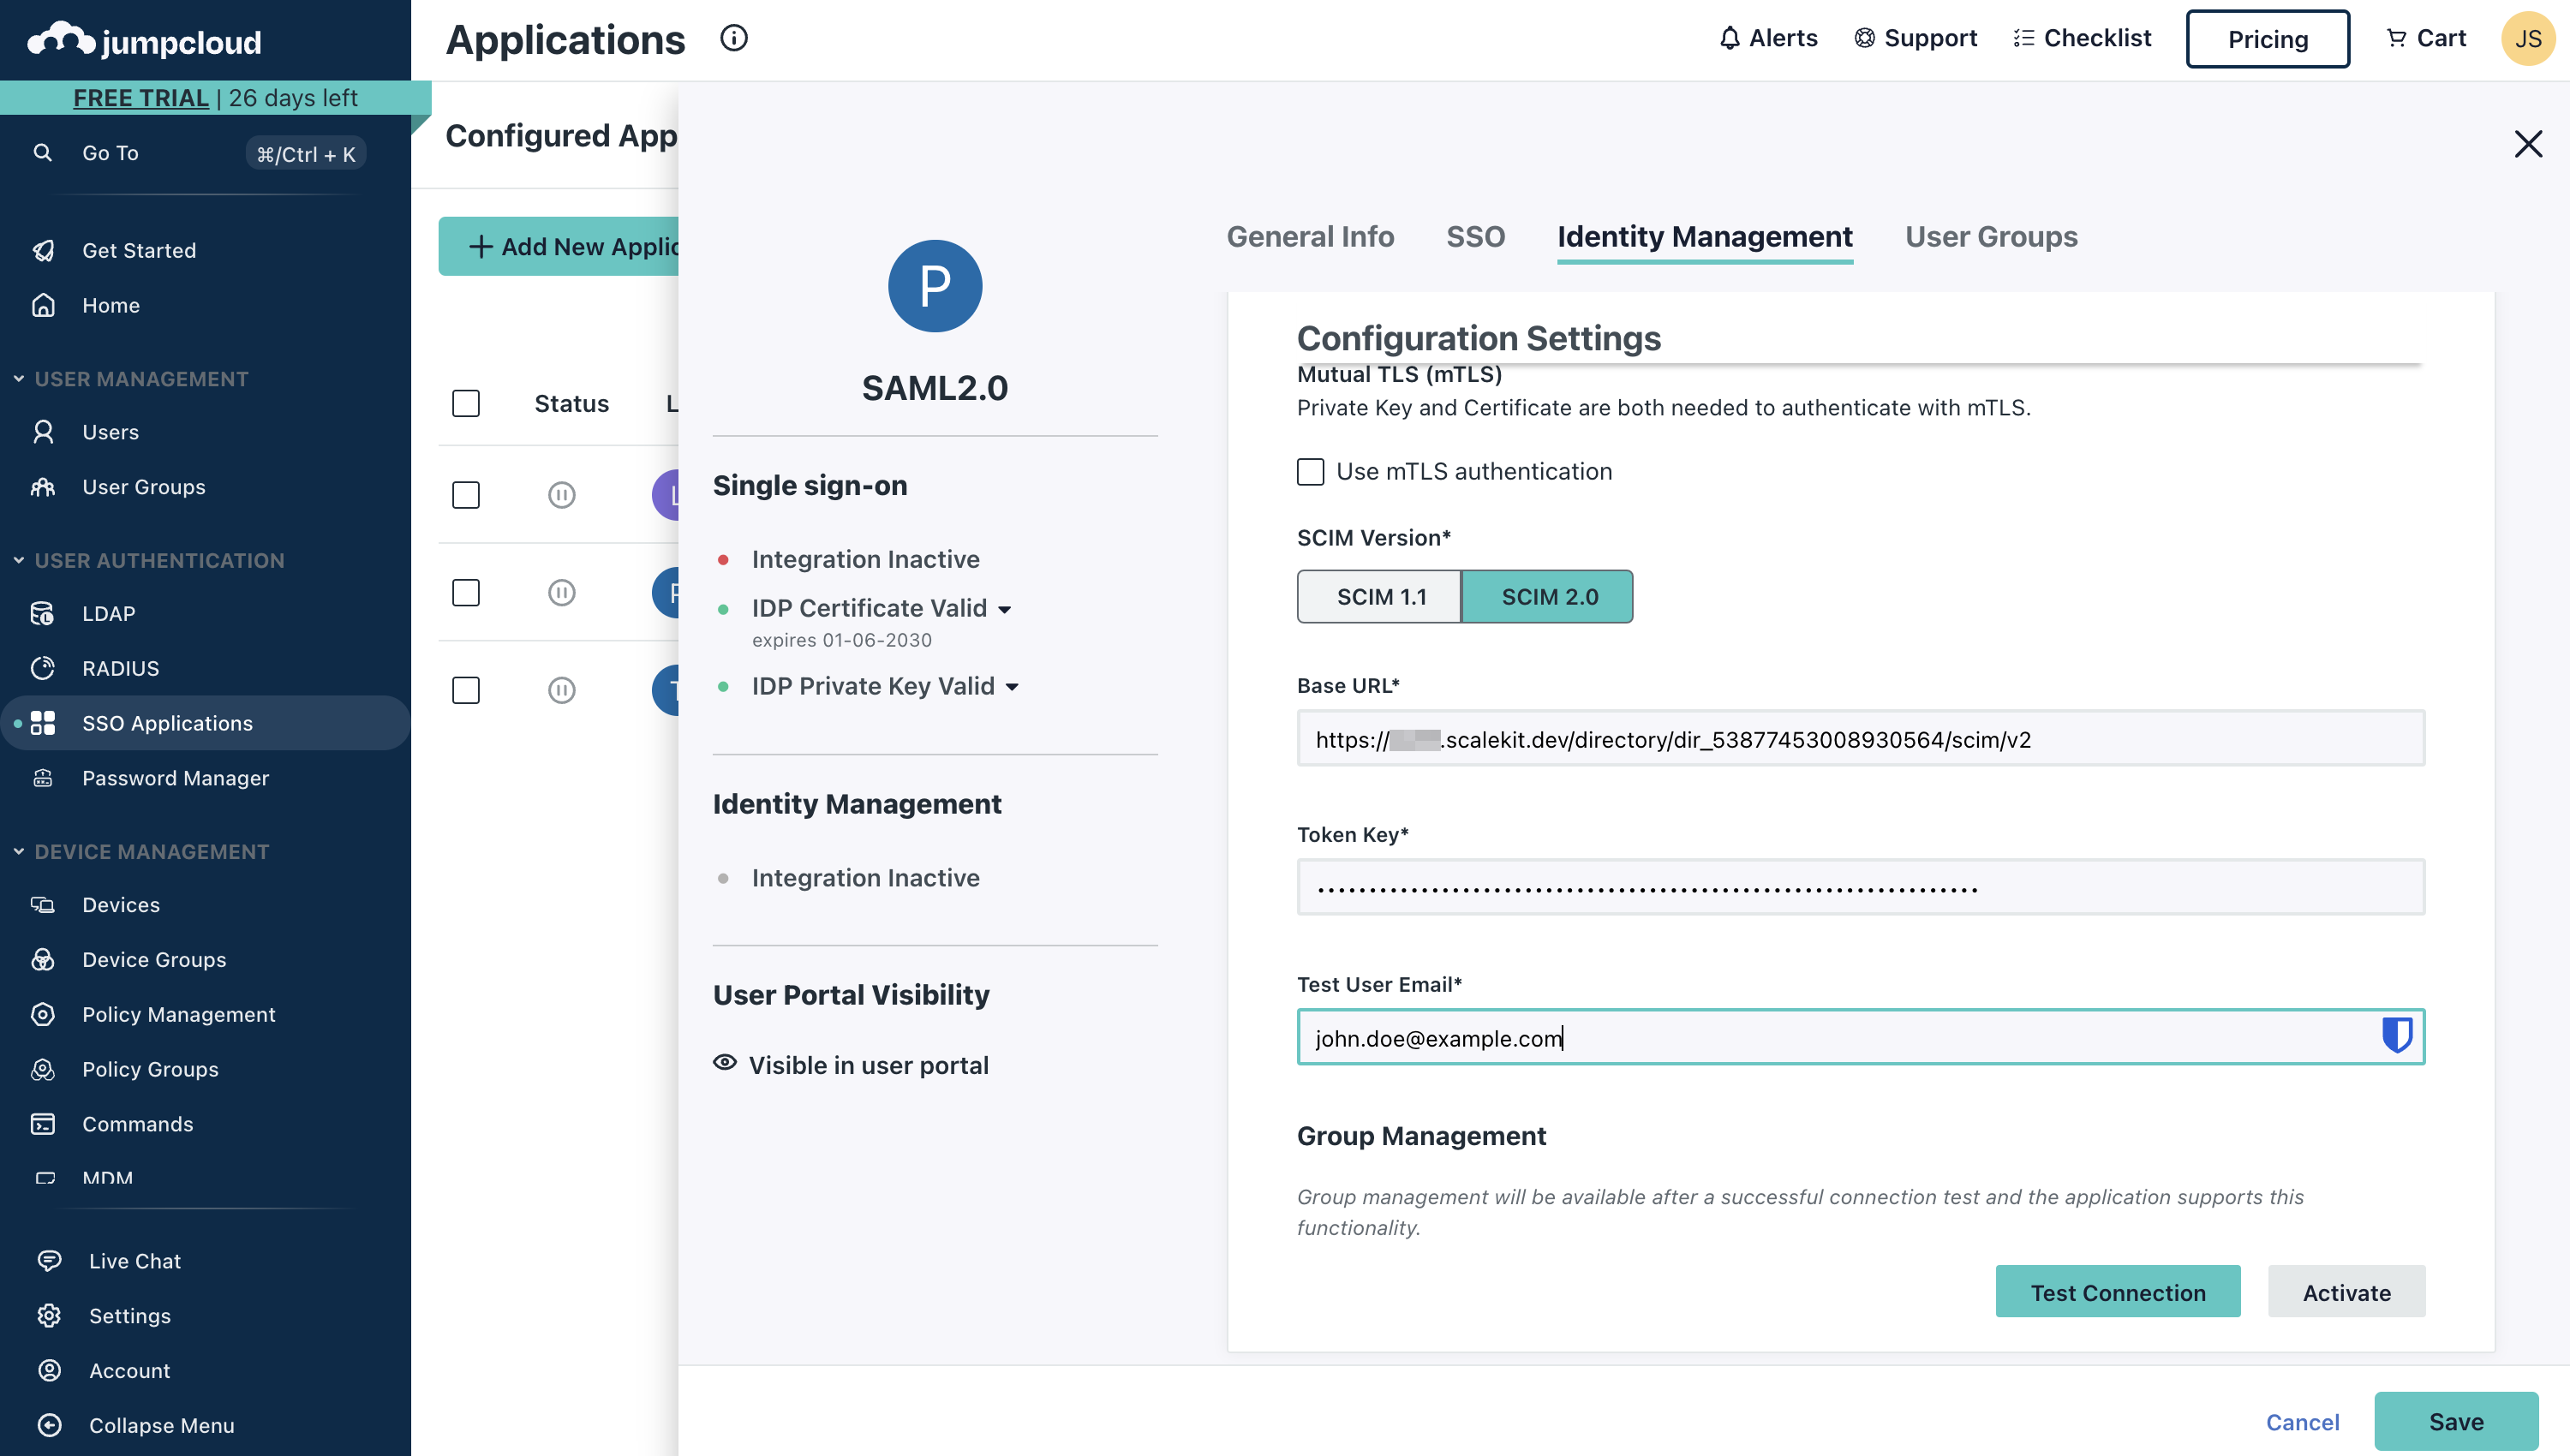
Enable Provisioning
- Select your new SCIM app in JumpCloud.
- Go to the Identity Management tab, then click Configure.
- Paste the Endpoint URL from SiftHub into Base URL.
- Paste the Bearer Token into Token Key.
- Click Activate, then Save.
-
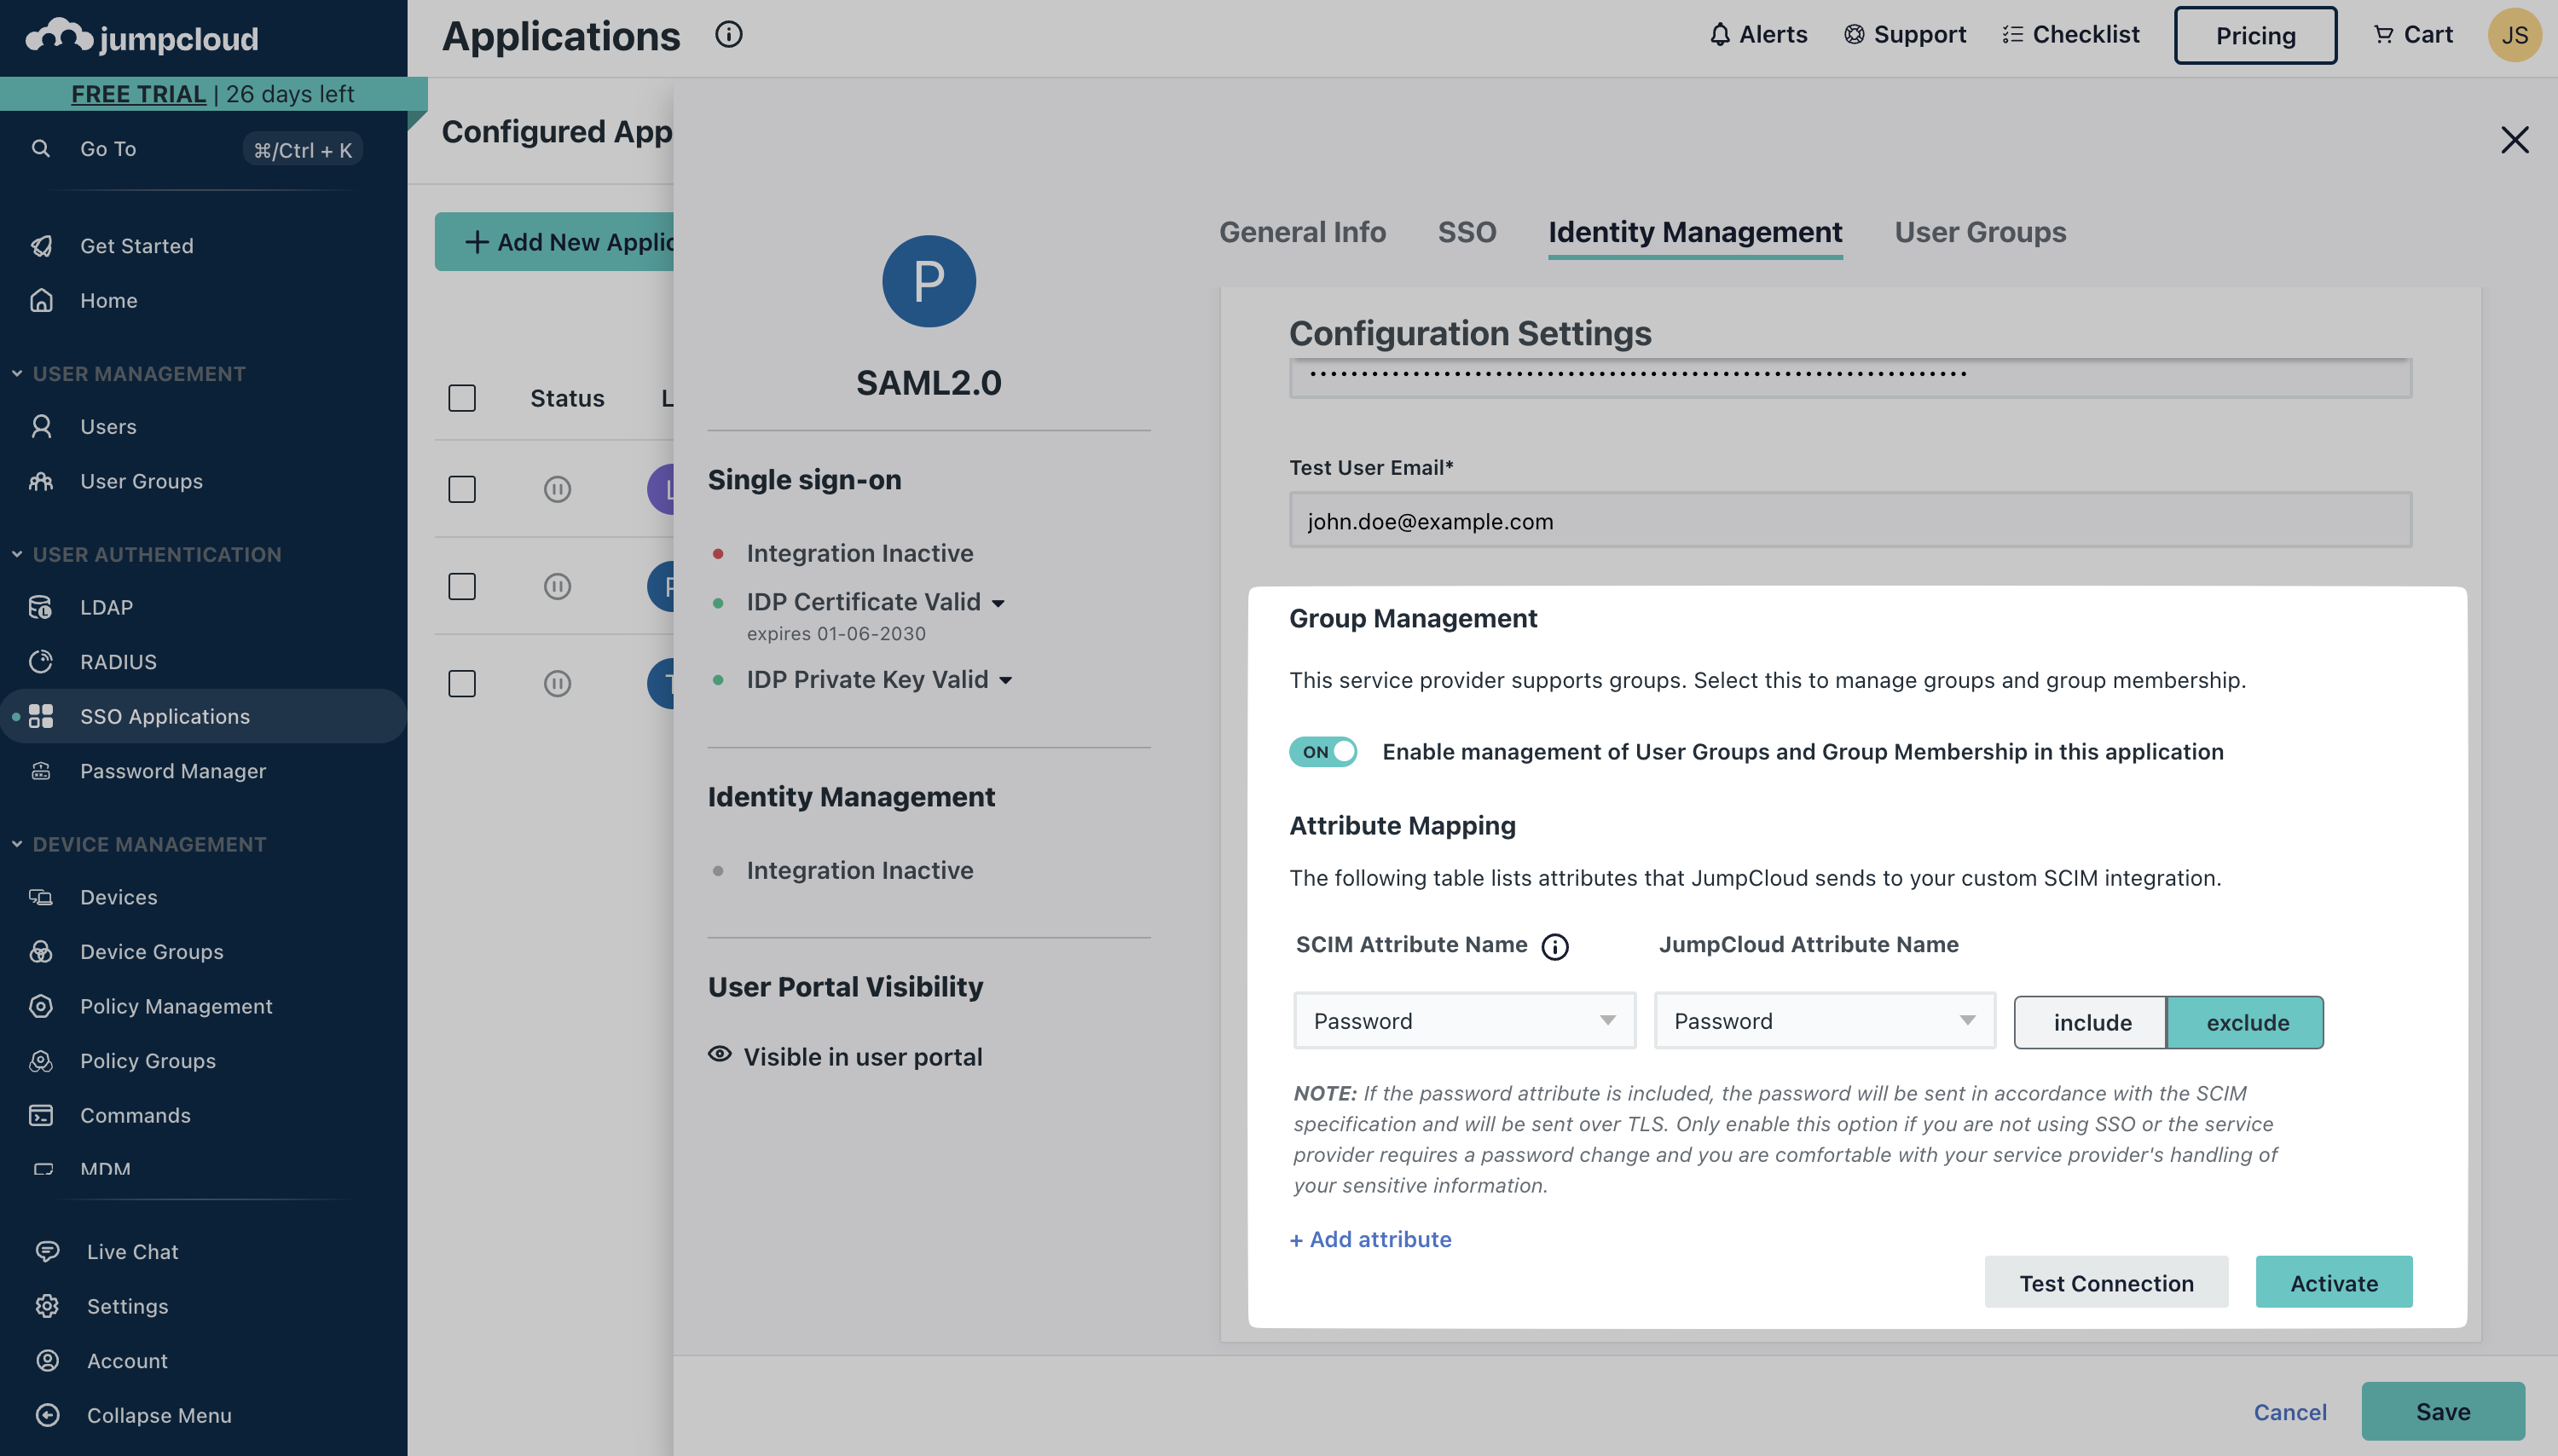
Set Provisioning Options
- Go to the Provisioning tab of your SCIM app.
- Under To App, enable:
- Create Users
- Update User Attributes
- Deactivate Users
- Click Save.
-
Assign Users and Groups
- Go to the User Groups tab of your SCIM app.
- Add the “SiftHub Users” group (or create one) and assign team members.
- To sync groups:
- Go to Push Groups, select Find groups by name, choose your group, check Push Immediately, and click Save.
- Go to Push Groups, select Find groups by name, choose your group, check Push Immediately, and click Save.
-
Verify Sync
- In SiftHub’s Admin Portal, check that users and groups from JumpCloud appear correctly.
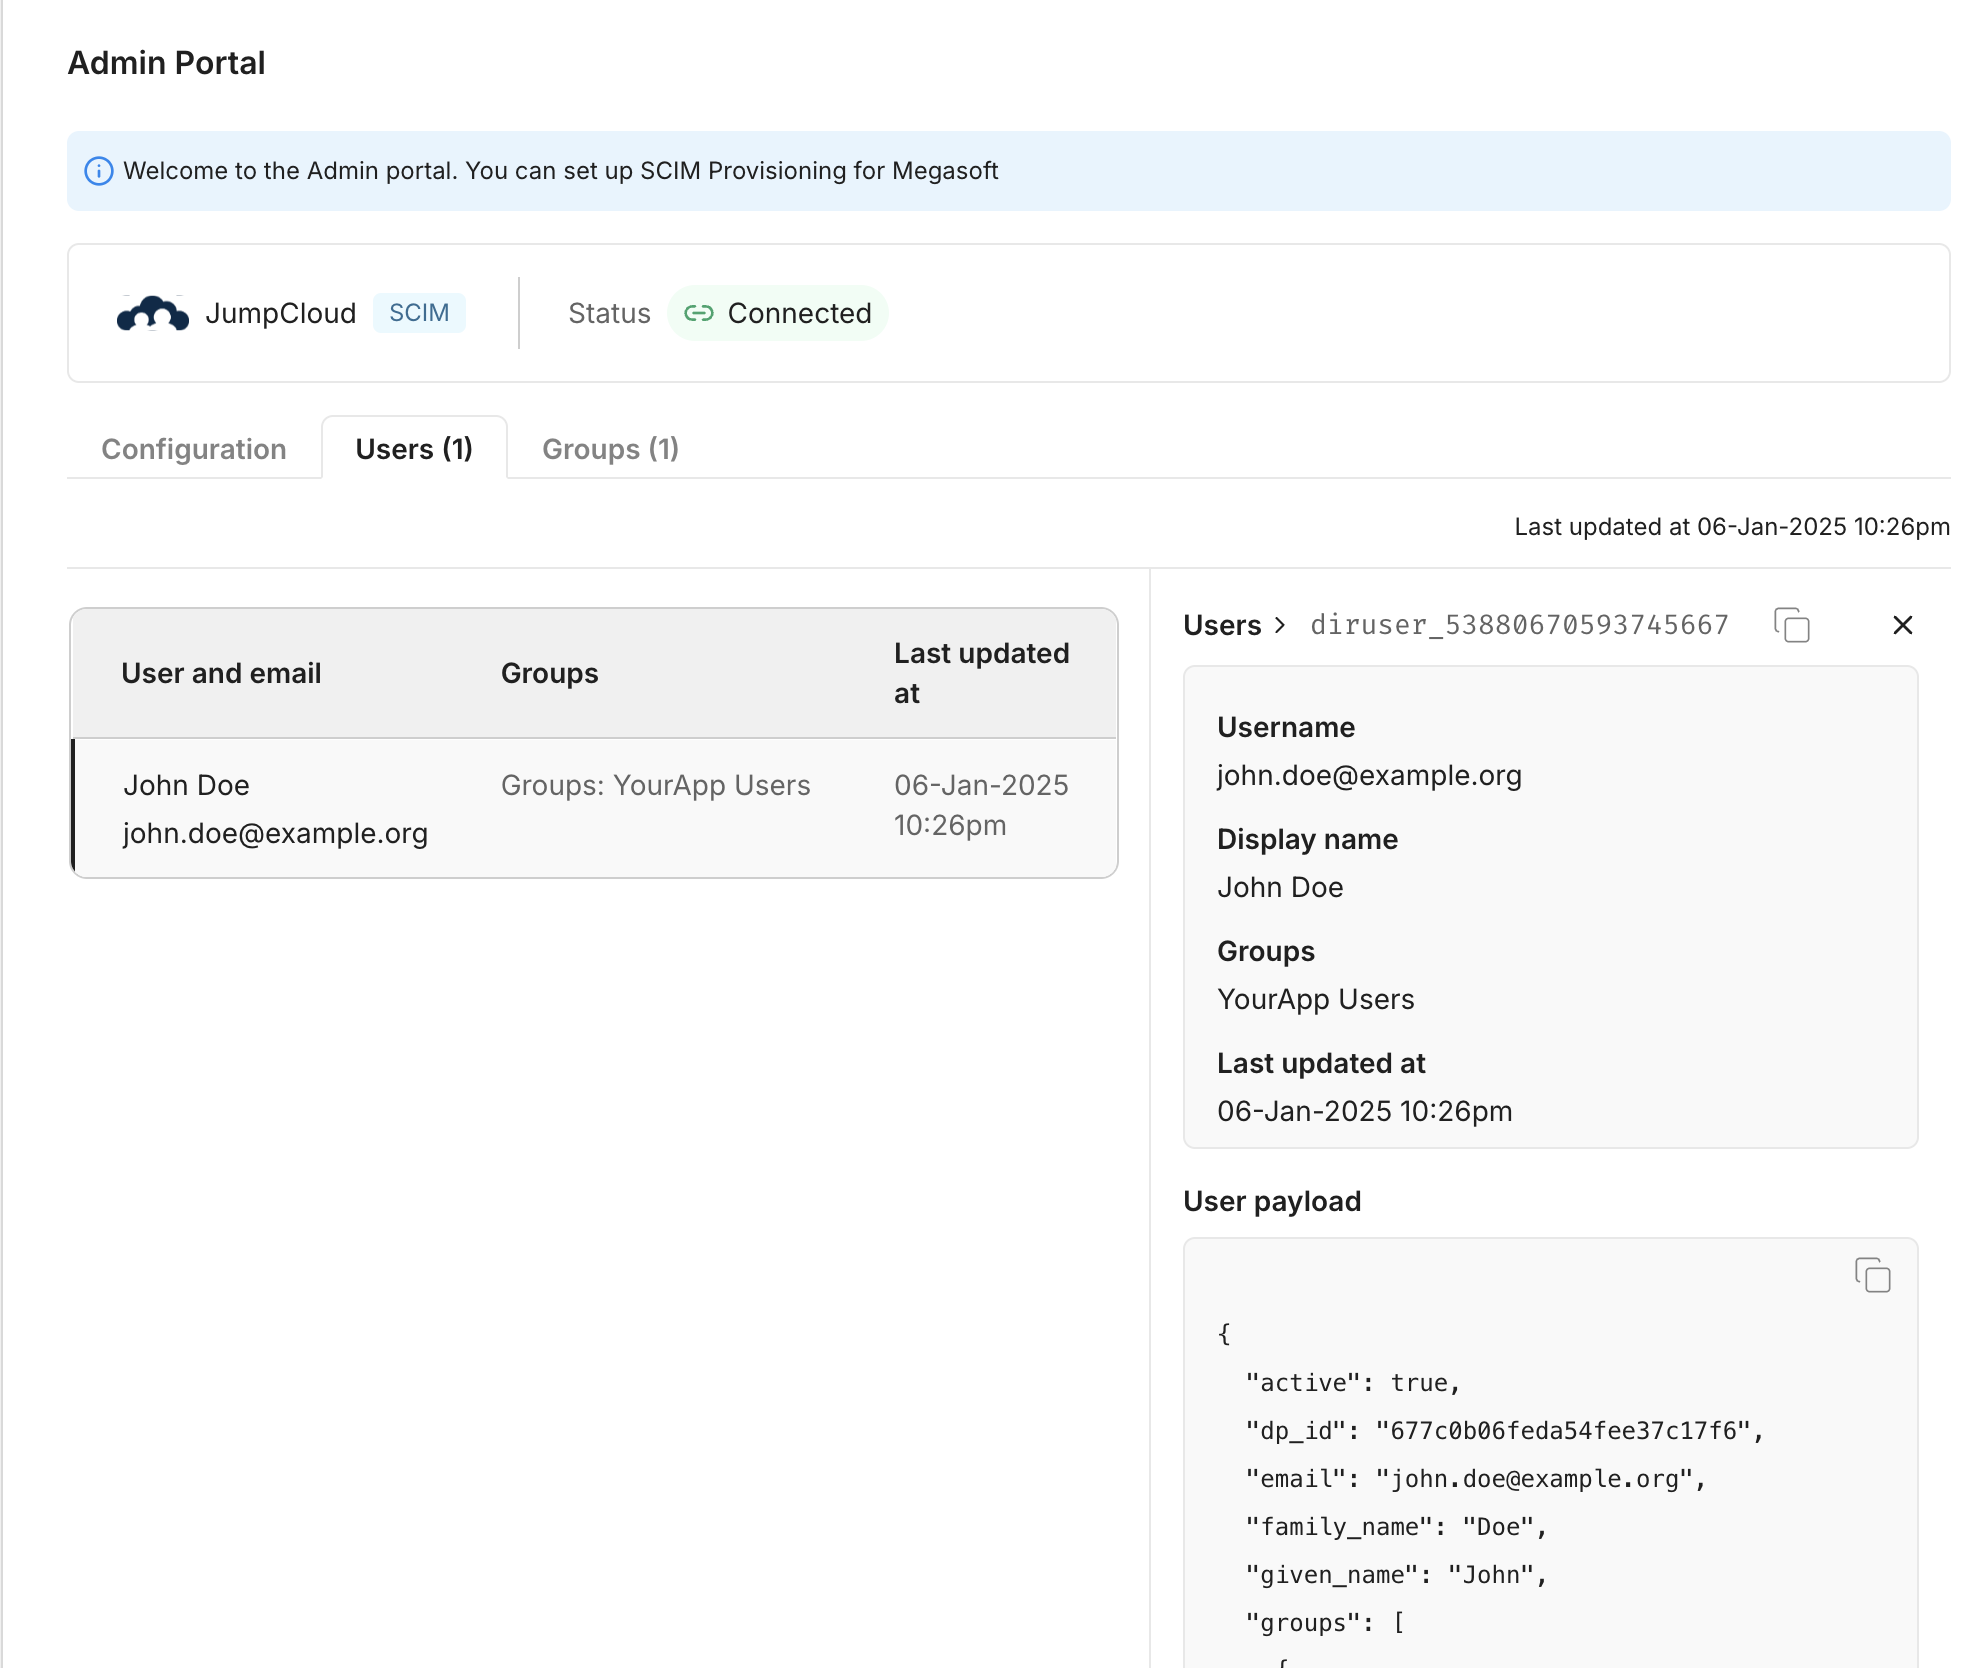
- In SiftHub’s Admin Portal, check that users and groups from JumpCloud appear correctly.
All Done!
Your team can now log in to SiftHub with JumpCloud credentials, and user changes will sync automatically. Questions? Reach out to SiftHub support!